Showing posts with label Starters. Show all posts

Monday, 2 April 2012

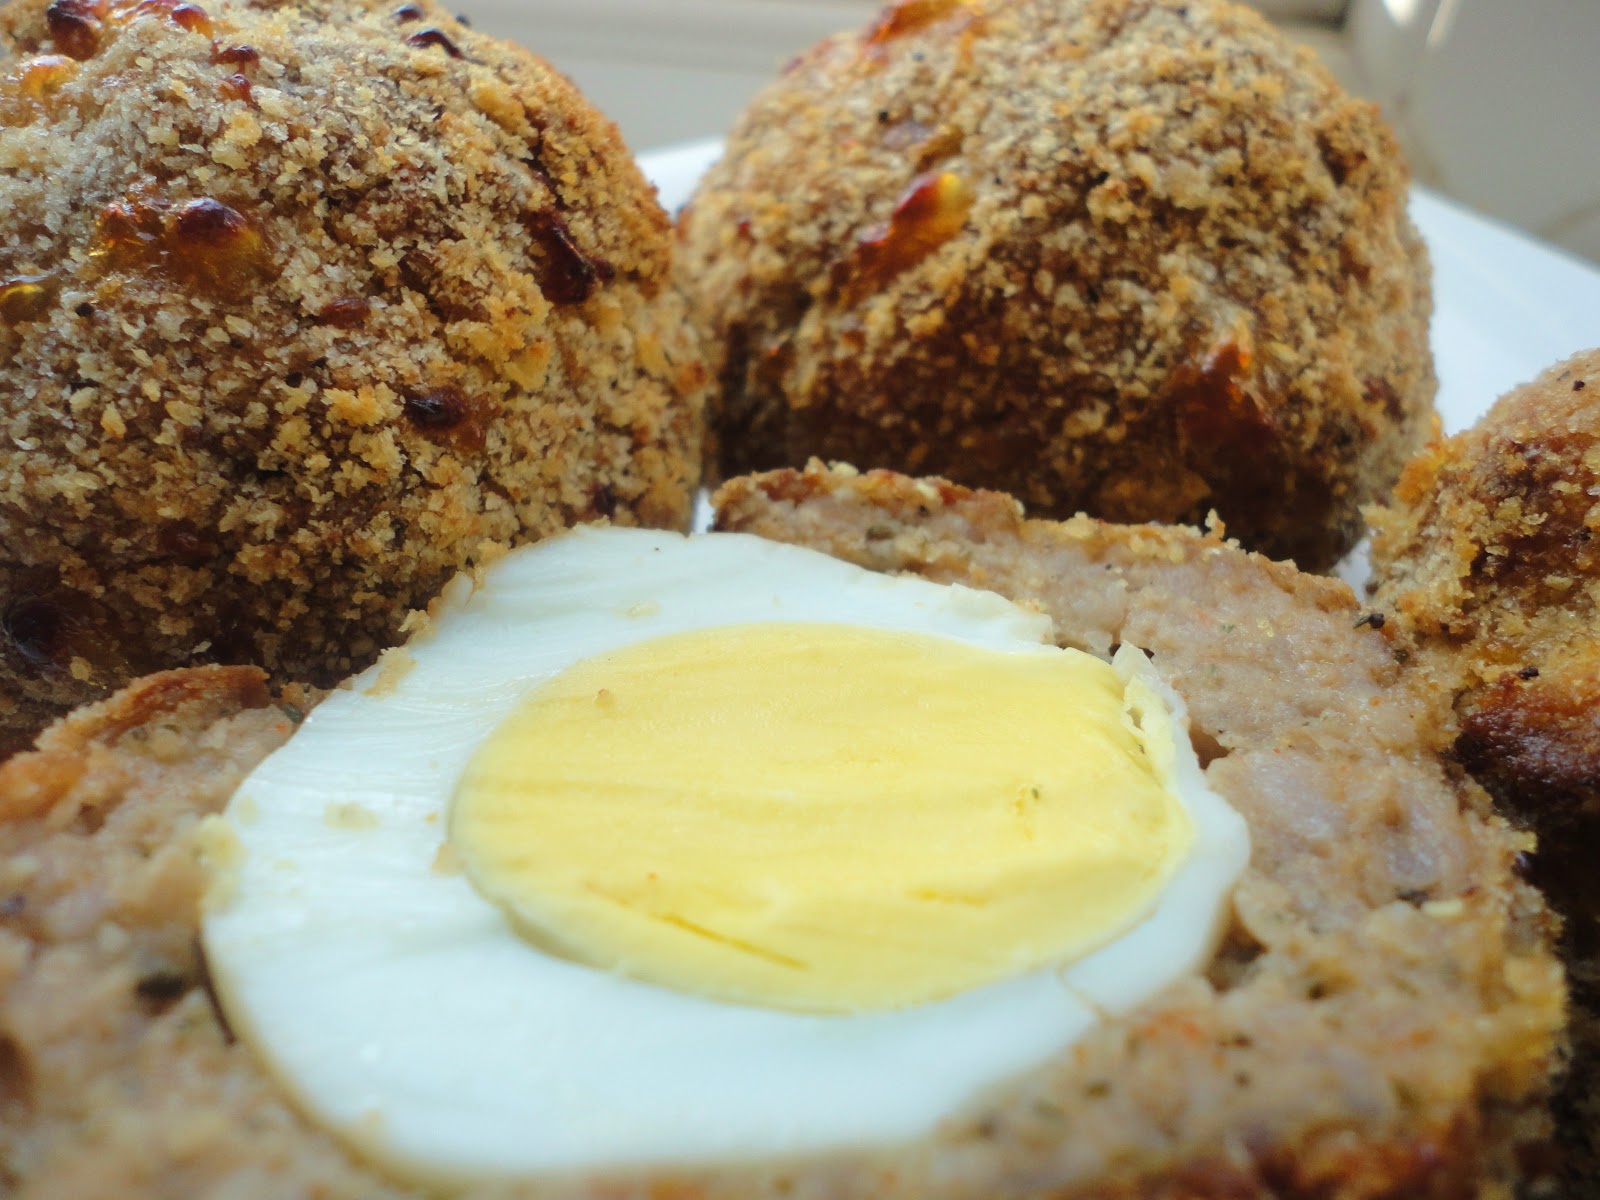
Giant Scotch Eggs


I'm a scotch egg lover. I remember when I was a child my mother used to pack mini scotch eggs in school lunches and I was soo excited whenever I found them in  my lunch box. I'd like to say a special thank you to my mum for my lunches actually, when I think  back to my school days I had awesome lunches filled with lots of snacks and treats that used to make the other kids jealous; no boring old jam sandwiches for me that's for sure.

I didn't realise just how easy it was to make scotch eggs until now and it's great because now I can make customised scotch eggs with all sorts of flavours; it's opened a whole new window. Since this was the first time I made them I thought I would stick to fairly basic ingredients. However next time I make them I've got a whole host of flavours I would like to try adding to the humble scotch egg, for example a bit of coriander for a more Indian touch, or maybe some lemon zest, or what about hoisin sauce (honestly I think it would work!). Another good thing about these scotch eggs is that they are baked and not deep fried making them 'healthier'. On the other hand when I baked them the sausage meat on some of them split and I just don't know why; if you know please let me know so I can learn. I've decided that next time I make them I'm going to try mashing up the egg with a bit of mayo and mustard instead of leaving the egg whole to make it more like the ones in the shops, but that's an experiment for another time.

Preparation time: 1 hr 20mins
Makes 6 giant scotch eggs
Recipe:

Ingredients
meat of 10 sausages / 550g sausage meat
6 eggs
seasoning suggestions for sausage meat: onion powder, garlic powder, paprika, Worcestershire sauce, tabasco sauce
1 beaten egg
bread crumbs seasoned with salt and pepper

Method:

1. Get the meat out of 10 sausages. I used Cumberland sausages.
 

2. Season the meat with 1/2tsp each onion powder and garlic powder and 1 tsp paprika. Add a splash of Worcestershire sauce and Tabasco sauce if you want an added kick. Mix into the meat well. Divide meat into 6 portions.
3. Into a pan of simmering water add all the eggs and boil for around 4-5 mins (you only want to partially cook the eggs). Take of the heat and replace the boiling water with cold water to cool the eggs. Remove the shells from the eggs.
4. Now you want to start assembling the scotch egg. Get a sheet of cling film and place a portion of meat onto it. Flatten the meat into a circular shape a little bigger than the eggs. You can coat your fingers with a little oil to stop the meat sticking to your fingers.
 
5. Place the boiled egg onto the meat pattie.
6. Use the clingfilm to help you mould the meat around the egg.
7. Once the meat is all around the egg, twist the top of the cling film to seal off the top.
8. Remove the clingfilm.
9. Dip in beaten egg and coat all over.
 10. Coat evenly in bread crumbs.
11. Arrange on a baking tray and bake at 160C for around 40mins to 1hr depending on your oven.
12. Eat hot or cold.


A post from Fullest of Life

Tuesday, 10 January 2012

4 Plait Braided White Bread

Today I tackled bread making. I have not always been that confident at making bread, and when I did make it the last time the loaf turned out hard and didn't rise. So you can understand why I don't really delve very much into the world of bread making. But today I felt optimistic and thought I would give it a go. I searched for a basic bread recipe and found one on the Good Food Channel. So I began, combining all the ingredients together and of course it turned out be be a big sticky mess and as much as I avoided getting my hands too messy I realised that there would be no other way; I don't have a bread maker or a food processor to do all the work for me so I didn't have any other option. My favourite part is the kneading, I can see how it can be quite soothing when you're feeling frustrated or angry, as you can put all this energy into the bread making. You actually need to kneed it for quite a while and you can't be too gentle; I swear my arms got a good work out. It's so satisfying when the bread actually rises as you know that you've done something right at least. I didn't want to make an ordinary loaf as you can buy that from the shops, so I decided to make something a little bit more special and pretty: braided bread. There is a bread called 'Challah' which is braided and contains egg, it's traditionally eaten by Jews on the Sabbath. Whilst my bread wasn't a Challah recipe I still wanted it to look like one, so I learnt how to braid it on youtube. Did you know that you can make breads from a number of strands (e.g.3,4,5 and 6) each resulting in a different pattern? One day I will make all the different ones and see which one I like the best. But for now I decided to go with the 4 stranded, simply because it's an even number which sounds good. If you don't want this extra hassle of braiding, just put the dough in a loaf tin and allow it to rise. So I've finished the hard bit which is mixing, kneading and waiting for the dough to rise, and now I'm finally ready to bake it, I'll let you know how it turns out when it's done.

It's in the oven...


Baking...


Baking...


Oooo it's turning golden in colour...


Still baking...


Smells good, mmmm...


Done!!!


Have a look, what do you think?


Check out the crust, soo glossy!

 Look inside- light and airy!


Verdict: It seems to have worked! Now I have bread to make butties :-)

Makes: 1 large loaf
Preparation time: 5 hrs

Recipe 

Ingredients:
500g strong white bread flour
300ml warm water
2 tbsp olive/vegetable oil
2 tsp sugar
1 tsp salt
a 7g sachet of dried yeast
1 beaten egg

Method:
1. In a bowl mix the flour, salt, and yeast till well combined.


2. In another bowl mix the water, oil, and sugar together till all the sugar dissolves.

3. Slowly add the water mixture into the flour and mix with a wooden spoon (or use a food processor to mix).


4. The dough should start to come together. You'll need to use your hands at this point to bring the dough together and then knead the dough (use the palms of your hands and turn the dough whilst you knead it)  for 10 mins.

5. Put the dough in an oiled container and place a wet kitchen cloth or an oiled piece of cling film on top. Leave to rest for around 2 hrs in a warm place till the dough doubles in size.

6. Place the dough on a lightly floured surface and punch the air out, and knead for 2 mins.

7. Mould the dough to what ever shape you like; put in a loaf tin, make rolls, or braid. Loosely cover with clingfilm and leave to rest in a warm place for around 1-2 hrs till the dough rises/ doubles in size.Use a pastry brush to glaze the dough with egg wash.


8. Bake in a pre-heated oven at 200C for 25-40 mins (the time really varies with the type of oven used and the size of the loaf) till the loaf sounds hollow and is browned on the surface, if the loaf looks like it's burning on the top place some foil over it whilst baking. You can also turn the bread over (without the tin) for the last 5 mins so that the base also becomes cooked.
To confirm that the bread is done you can also use a meat thermometer through the base of the bread which should have a core temperature of 94C (200F).

9. Leave the bread to cool on a wire cooling rack or eat whilst it's nice and warm.
 

Source:
The Good Food Channel
Youtube


A post from the Fullest of Life
 

Monday, 31 October 2011

Roasted Pumpkin Soup


What's Halloween without pumpkin soup?! I know that your mum's soup is the best but this is also pretty good. It's a warm, hearty soup which is very easy to make; throw everything onto a roasting dish, bake and blitz, it's as simple as that I promise. 

HAPPY HALLOWEEN

Preparation time: 1hr
Serves: 4-6

Ingredients

1 pumpkin carved out
1 1/2- 2 onions
5-6 cloves garlic
1 tsp all spice
1/2 tsp ground cinnamon
1/2 tsp ground ginger
1/2 tsp ground nutmeg
Boiling water
Salt and pepper to taste
a drizzle of oil
1 bay leaf
4 cloves
Cream to garnish

Method

1. Place the pumpkin on a roasting dish lined with foil. 
2. Roughly chop the onion and place into the roasting dish.

3. Roughly crush the garlic and place onto the roasting dish.

4. Add all the spices, salt and pepper to the roasting dish. 

5. Mix the contents of the roasting dish a little.

6. Drizzle some oil (olive oil) on top of the pumpkin mixture.

7.Bake in the oven at 180C for 1hr to 1hr 30mins till everything is tender.

8. Remove the bay leaf and cloves. 

9. Blitz everything using a blender. 

10. Add boiling water to the soup to get it to the desired consistency.

11. Add more salt and pepper to taste and stir in some cream if you want. 

12. Serve warm.


A post from Fullest of Life


Saturday, 3 September 2011

Pan-fried Gnocchi with Balsamic Sun-dried Tomatoes

The first time that I ever had gnocchi was in Nice, France, where I tried it with a creamy scallop sauce. It was from that moment on that I knew I would be eating a lot more of the stuff. I fell in love with the soft and slightly chewy texture of the gnocchi- a cross between pasta and a soft potato. Gnocchi is actually made from flour, eggs and mashed potato and then shaped into the authentic oval dumplings and then boiled like pasta. The process to make gnocchi would take quite a bit of time and effort so I resort to buying it in the supermarkets instead; you can get fresh gnocchi in the fridge section or a vacuum packed dryer version in the pasta section. 

I tried pan-fried gnocchi at a restaurant called 'Fellicinni' and the dish was beautifully done; with the gnocchi being accompanied by goat's cheese, cherry tomatoes, olives and salad leaves. I had a craving for weeks to have pan-fried gnocchi again after leaving the restaurant. Consequently I was inspired to make my own version with what I had in the fridge; sun-dried tomatoes. My version definitely left me satisfied and the feeling of wanting more so I guess I will have to make it again. It is something that is so very easy to make and tastes fabulous and looks quite impressive at a dinner party; there is even potential to add more glamour to the dish by simply adding things like cheese (feta or goat's cheese) and green leaves.


Serves: 2
Time: 15 mins

Ingredients:
A packet of ready made gnocchi
4 large cloves of garlic finely chopped
around 8 sun-dried tomatoes chopped (I used the ones in oil)
3 tbsp balsamic vinegar
Pinch sugar
Salt to taste
Olive oil
Pan of boiling water

Method:
1. Boil the gnocchi reading the instructions on the packet- it should only take around 2 minutes once placed in boiling water. Drain the gnocchi.
2. Heat some olive oil in a pan and add the garlic and fry till golden, then add the sun-dried tomatoes and fry some more.
3. Add the gnocchi to the pan and fry with the tomatoes and garlic till a lightly browned. 
4. Add the balsamic vinegar to the pan and fry till the gnocchi are a bit more browned- don't burn them.
5. Add the salt and sugar to taste.
6. Always serve gnocchi warm and never cold as the texture is at its softest when warm.

Suggestions:
1. Serve on a bed of rocket and goats cheese or feta.
2. Add herbs such as basil to garnish
3. Make a balsamic dressing by reducing the balsamic vinegar down to a thick sauce to dress the gnocchi.


A post form Fullest of Life

Saturday, 20 August 2011

A Lesson in Sushi Making


I love sushi and have eaten it is many restaurants, however I thought I would attempt to make my own; the first time I made it they were half falling apart, and this is the second time I made it with a much better result. I was first introduced to sushi 2 years ago by my best friend, Emma-Lily, at first I only ate vegetarian sushi as I couldn't get my head around eating raw fish, however eventually I braved myself to try the real thing and I  was surprised as it didn't taste as fishy as I thought it would, and this was the moment that I fell in love. The fresher the fish the better the sushi. I found that sushi is an acquired taste and the more you eat the more you like it. The addiction to sushi started when Emma-Lily made an array of beautiful sushi for my surprise birthday 2 years ago and I was blown away by how amazing they looked and how tasty they were. Ever since I have been having occasional sushi cravings.


Sushi is so versatile and you can put literally what ever you want in the middle, from normal things like fish, tempura and vegetables to more unusual things like big macs (yes it has actually been done). I think that wasabi and soy sauce are a must with any sushi, especially wasabi as it's that flavour that I associate with sushi. Not everyone likes wasabi tough as they find it too strong and hot, on the other hand that is exactly the reason why I love it- for the punch through the nose it gives you (really clears your sinuses) and the clean, refreshing taste afterwards, the good thing is that the heat is different from the spiciness of chillies and lasts only temporarily.

Well made sushi can look like a piece of art, and you can be creative as you like in decorating it, from elaborate designs to the plain and simple- they all look good as sushi is a naturally pretty food. You can use toppings such as mayonnaise, chili flakes and caviar (fish roe). Sushi is most striking when presented in straingt lines and on a plain background like white plates.


I made a video to show my attempt at sushi making in a way that anyone can have a go at it. In the video I have shown how to prepare sushi rice, maki sushi, California roll and nigiri sushi using simple techniques. You can vary the fillings to suit your own taste, ideas are: avocado, cucumber, smoked salmon, boiled king prawns, crab sticks, fresh raw fish (salmon and tuna work well), tempura, peppers, omelette, and the list can go on and on. Have fun with the sushi making and don't be afraid to experiment.


A post from Fullest of Life